FAQs
I want to update my registered email address, How to update that?
Login into Web Platform
Click on the username – top right corner
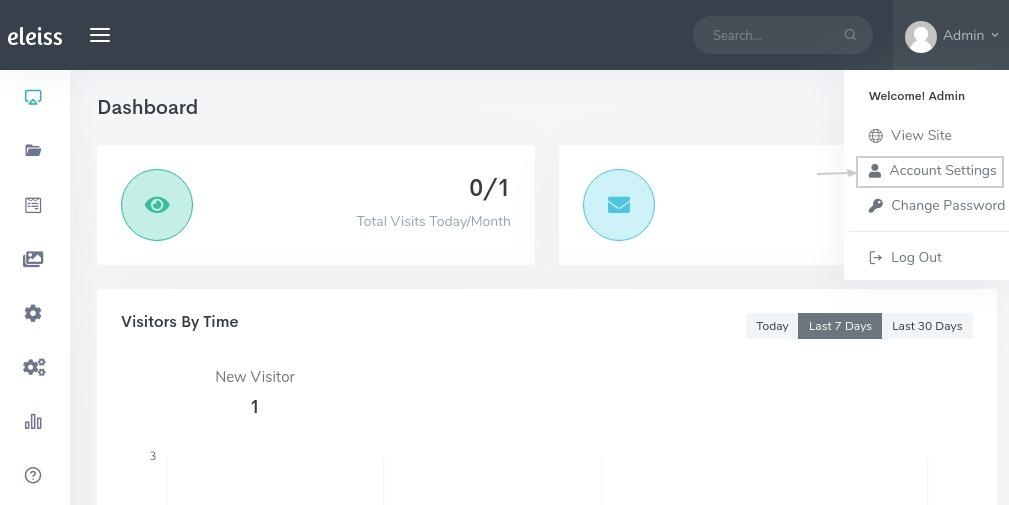
Click on ‘Account Settings’
Update the existing email address
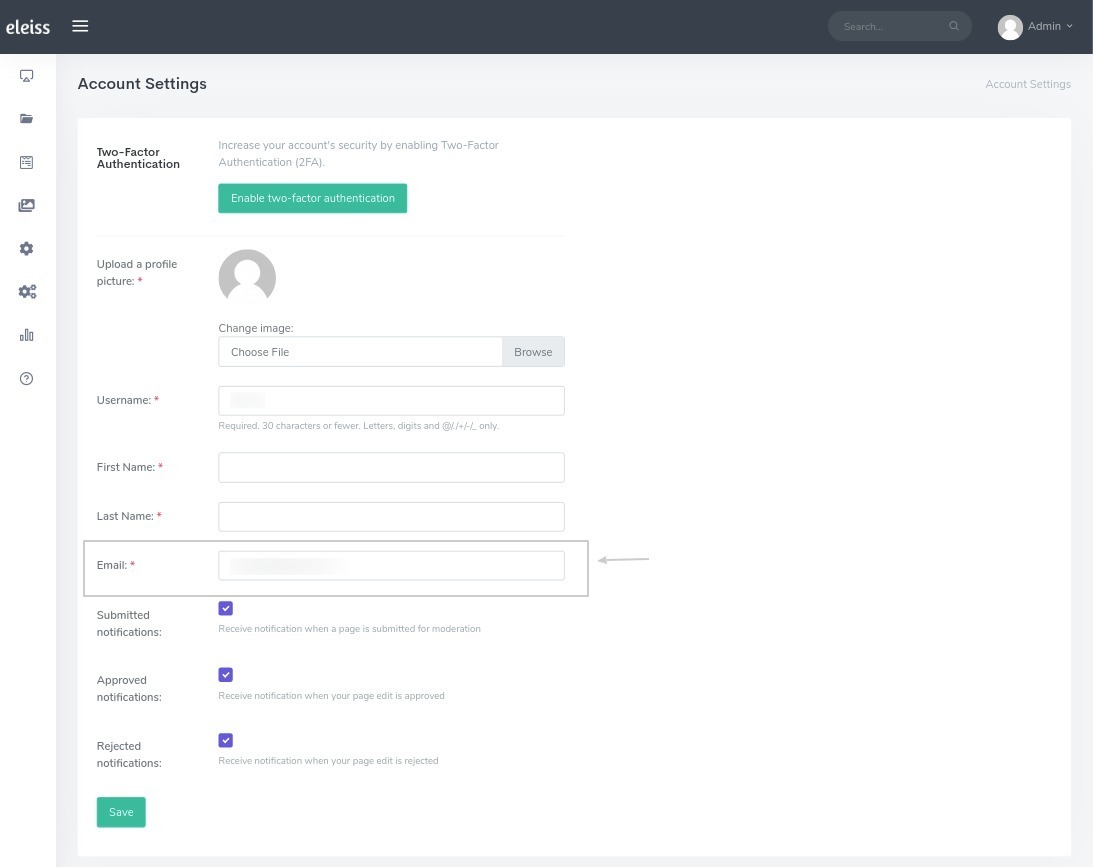
Click on ‘Save’
How to change default receipt email address for a particular form??
Commonly, Default inquiry email address is set in ‘Settings > General Settings > Site Settings’. All the inquiries will send to that email address(es).
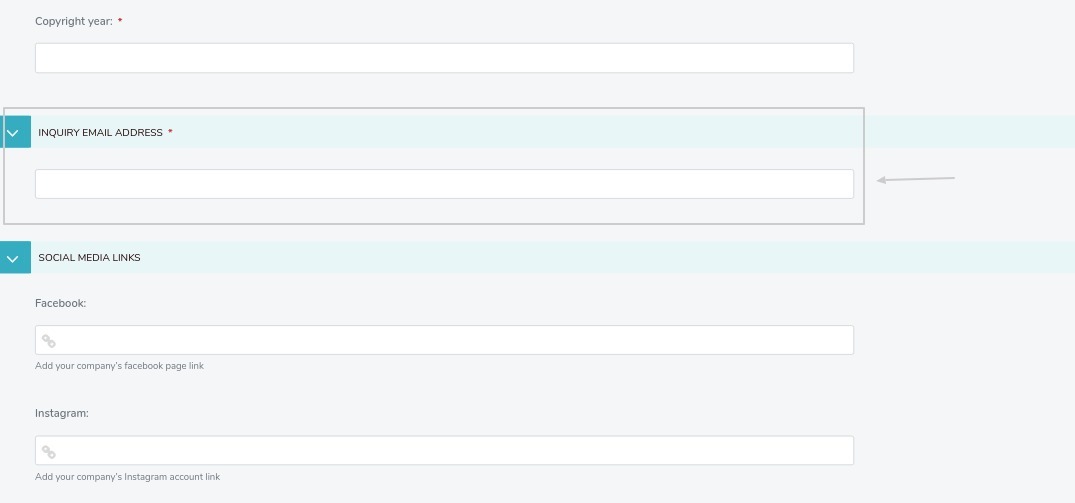
If you want that specific form’s inquiries send on specific email address(es) then follow below steps,
Go to ‘Conversion Forms’ from Menu
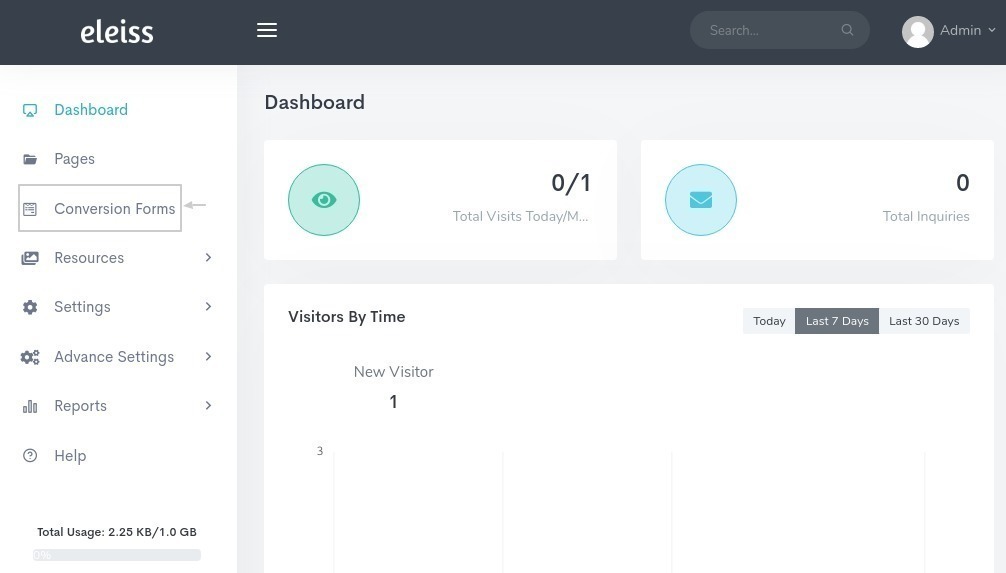
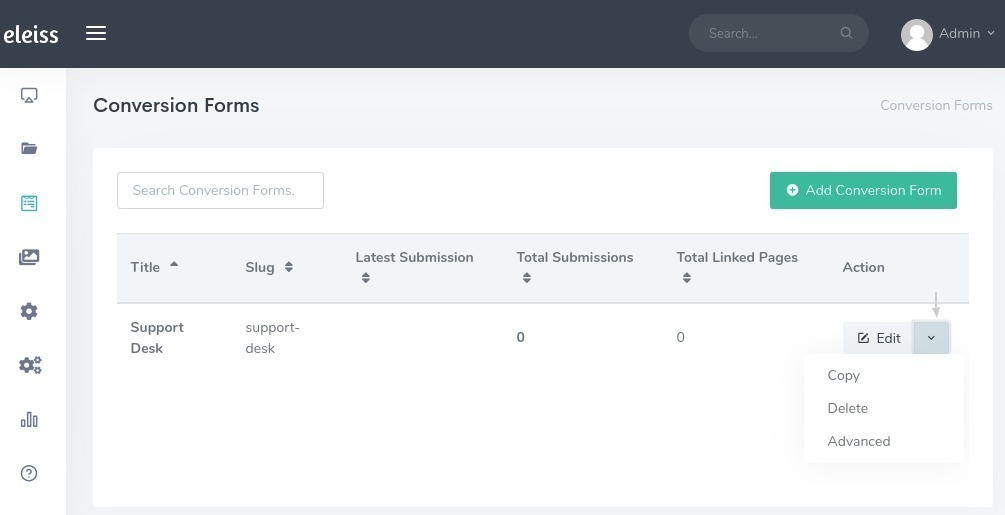
Click on dropdown and select ‘Advanced’ from ‘Action’ column for specific form
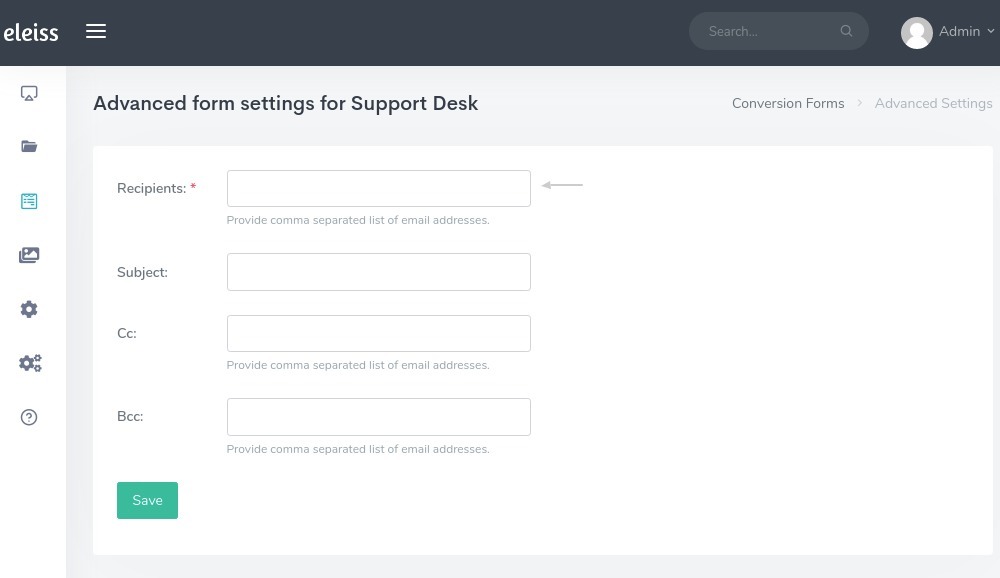
Enter recipient email address(es)
Note
This will overwrite the default email address for that form
Click on ‘Save’
I want to add my email address to cc for all the product inquiries generated from website, How to do that??
To add email address(es) in cc for particular form follow below steps,
Go to ‘Conversion Forms’ from Menu

Click on dropdown and select ‘Advanced’ from ‘Action’ column for specific form

Enter email address(es) into cc
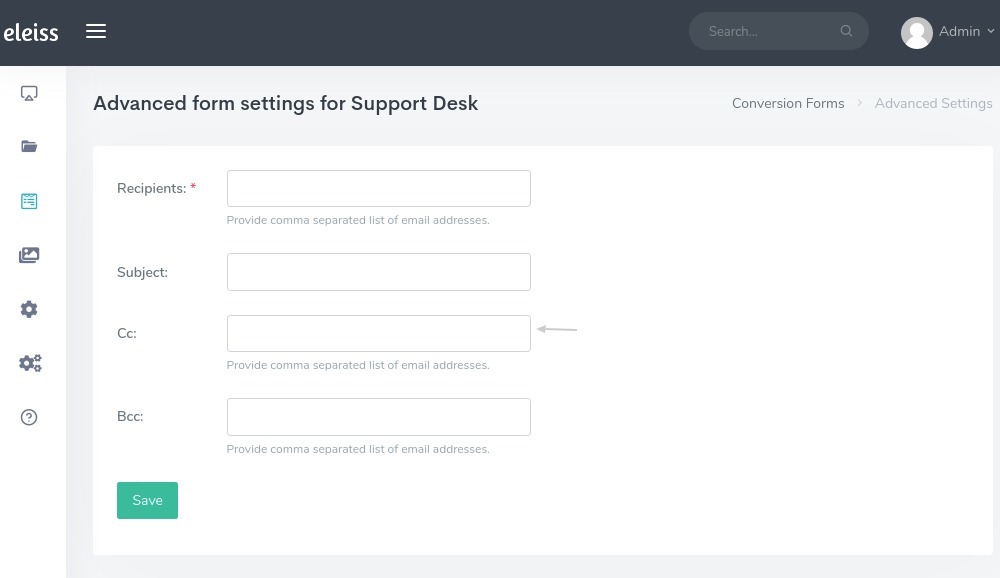
Click on ‘Save’
How to update subject of email for particular form inquiry?
Go to ‘Conversion Forms’ from Menu

Click on dropdown and select ‘Advanced’ from ‘Action’ column for specific form

Enter subject
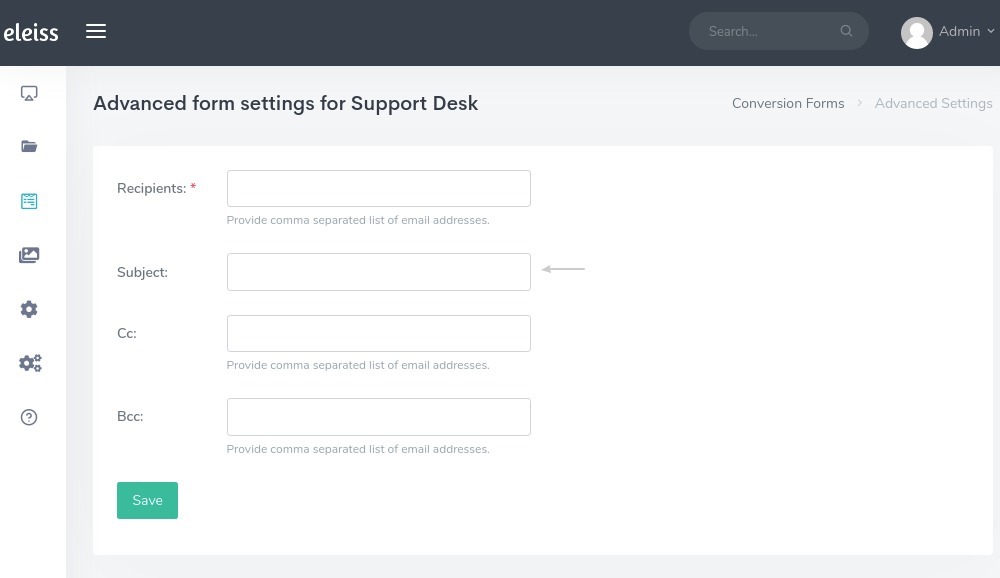
Click on ‘Save’
When visitor successully submit product inquiry, Visitor should redirect to Product page instead of Home page… Is that possible?
Yes, after successful submission of any inquiry you can redirect visitor to specific page. Follow below steps,
Go to ‘Conversion Forms’ from Menu

Click on edit form for which you what to perform this setting
Scroll down the page to ‘POST REDIRECT PAGE’ section, Click on ‘Choose a Page’ and choose the page on which you want visitor should redirect after submission
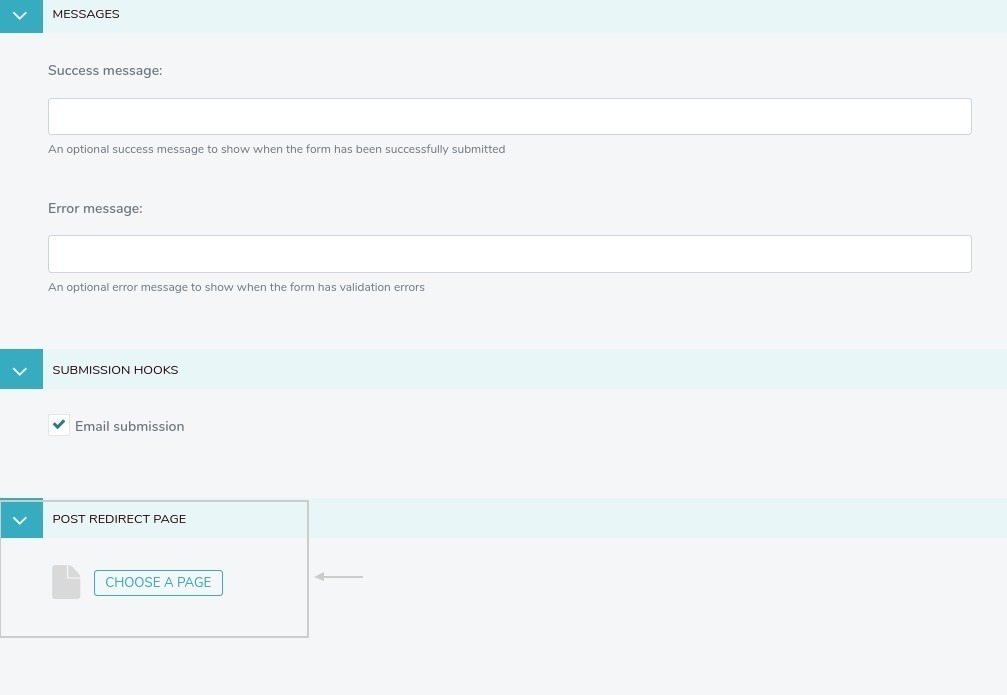
Click on ‘Save’
How to create password protected page on website?
Your Plaform contains Privacy settings for pages. Privacy settings are as below;
Privacy |
Meaning |
|---|---|
Public |
Visible to visitors(Default) |
Private, accessible to logged-in users |
Page is private, accessible to users who has logged in into the System |
Private, accessible with the following password |
Page is accessible with password. User who has logged in to System also have to enter the password to access that page |
Private, accessible to users in specific groups |
The groups which has the permission can view this page |
So, to enable password protected page on website follow below steps,
Login in into System
Go to ‘Pages’
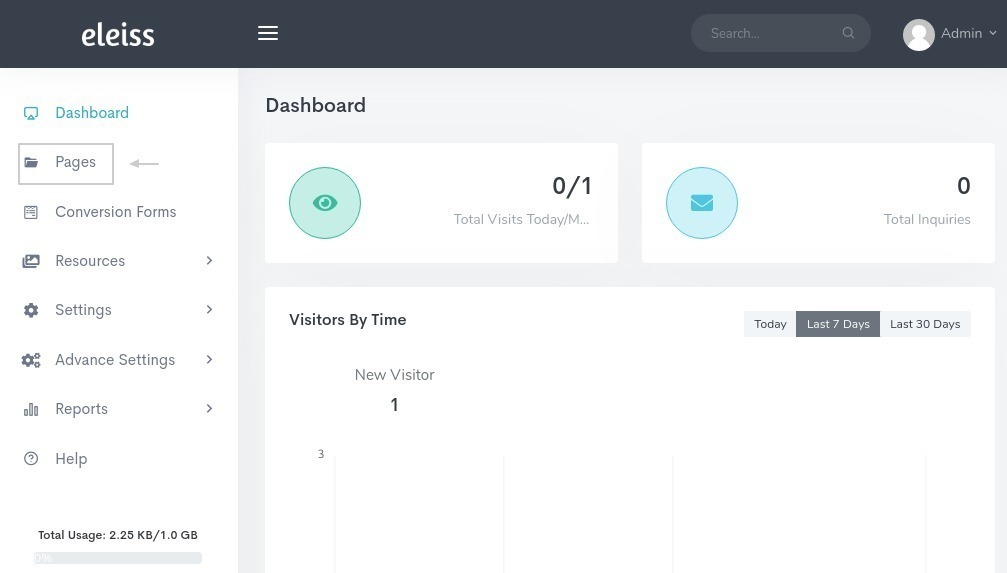
Click on dropdown menu and select ‘Privacy’ from ‘Action’ column of a page for which you want to make this setting
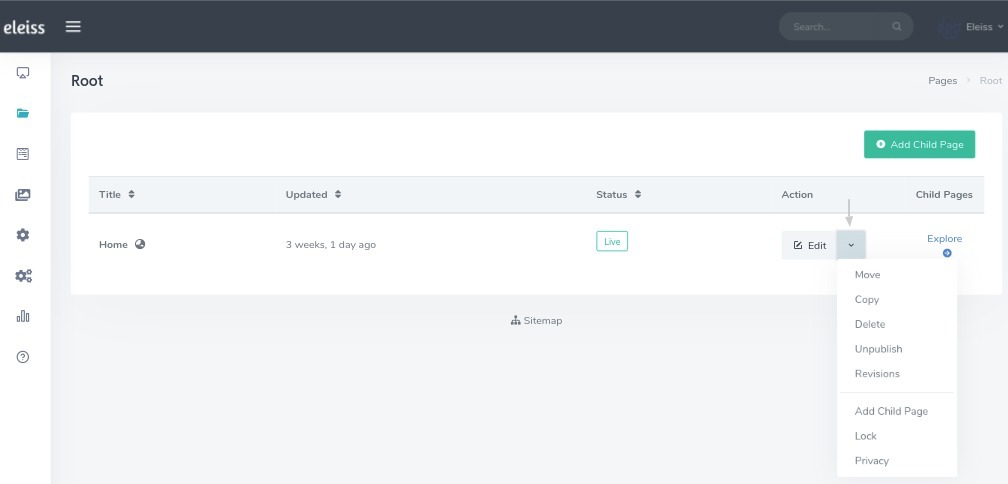
Click on ‘Privacy’ and select option ‘Private, accessible with the following password’ and set password
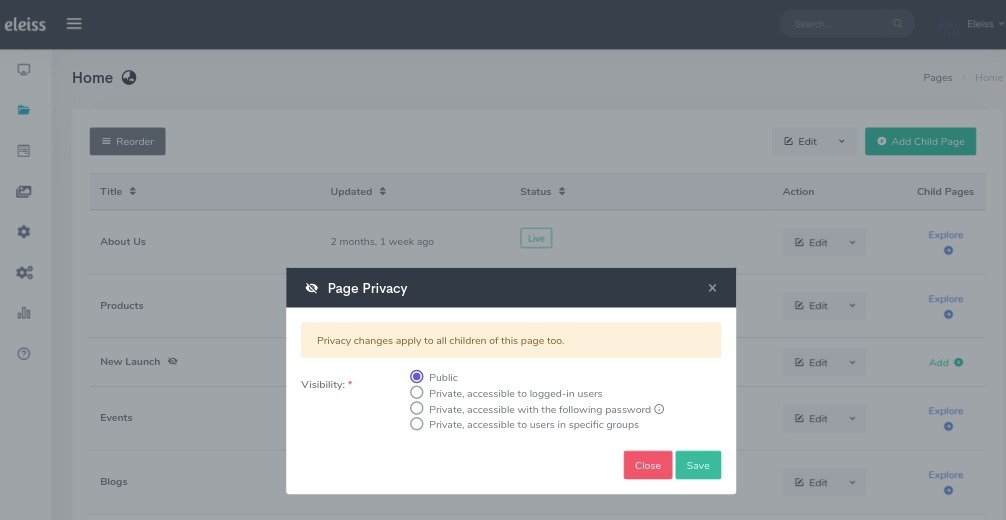
Set password
Click on ‘Save’
How to add sitemap on website?
You are not supposed to add sitmap for your website. Your System will automatic generate sitemap for your website.
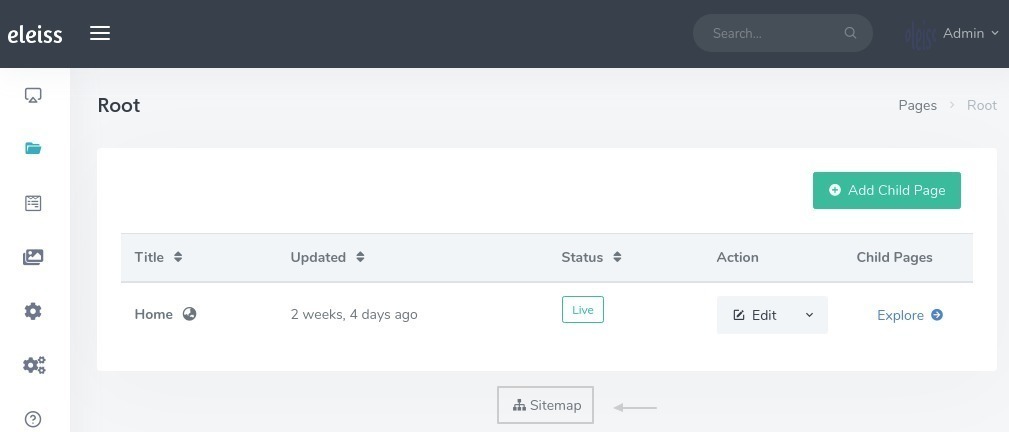
To view sitemap, Go to ‘Pages’ from Menu and at table bottom ‘Sitemap’ link is there, click on it to view sitemap.
Note
This is an automatic feature in all plans.
How to add favicon/site-icon on website?
Your System will automatically convert your uploaded siteicon image to different sizes for different browsers and devices support. You only need to upload single siteicon image. Follow below steps,
Go to ‘Settings > General Settings > Site Icon’ from Menu
Upload siteicon image
Add title
Click on ‘Save’
I want to add my email address to bcc for all the support inquiries generated from website, How to do that??
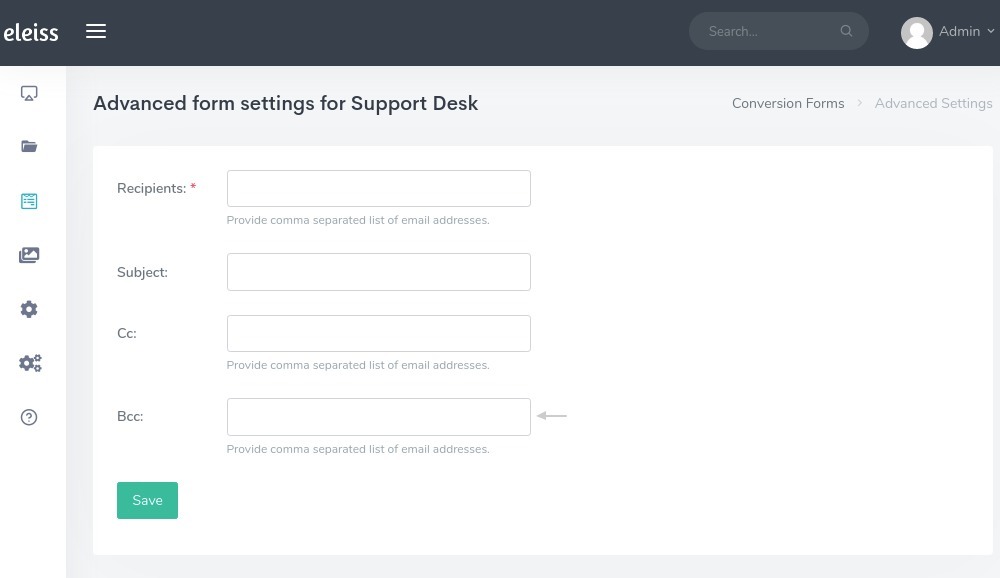
To add email address(es) in bcc for particular form follow below steps,
Go to ‘Conversion Forms’ from Menu

Click on dropdown and select ‘Advanced’ from ‘Action’ column for specific form

Enter email address(es) into bcc
Click on ‘Save’
How to create different users and gave permission to them?
Using our System you can create three types of users:
Administrator User
Editor User
Moderator User
Get an Editor user to create and edit your content without the control to make it live. Get the Moderator user to review the content and make it live. Get the admin to lock the critical content to avoid any content mishap.
Click here to know that which user can perform which operations.
Follow below steps,
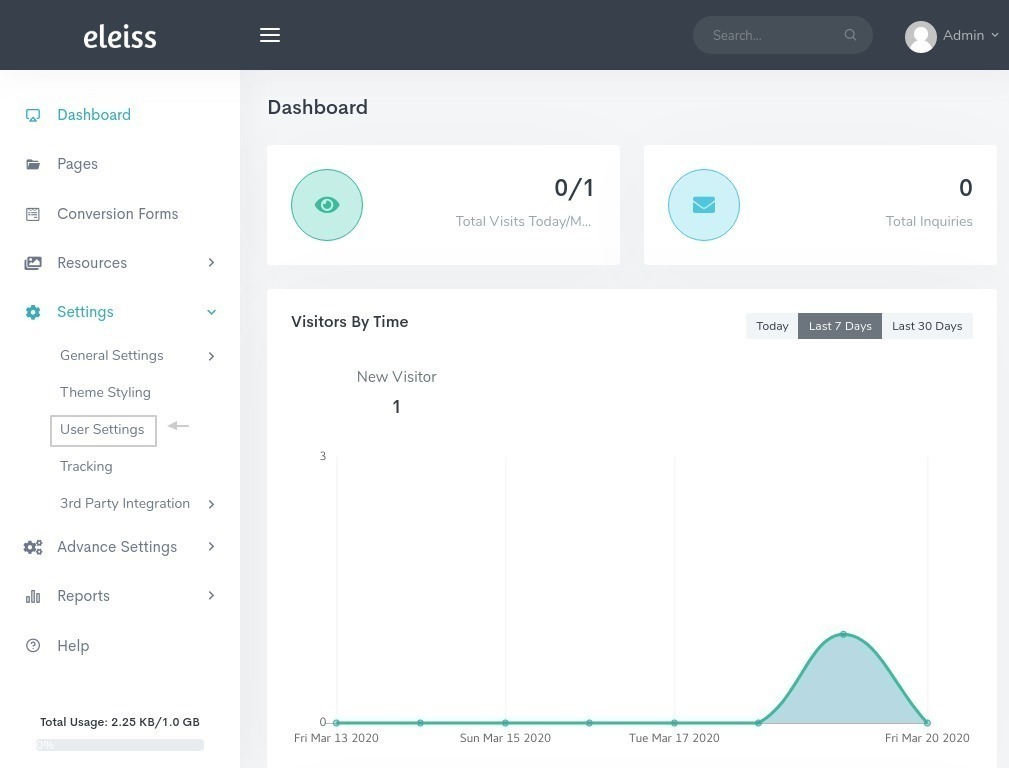
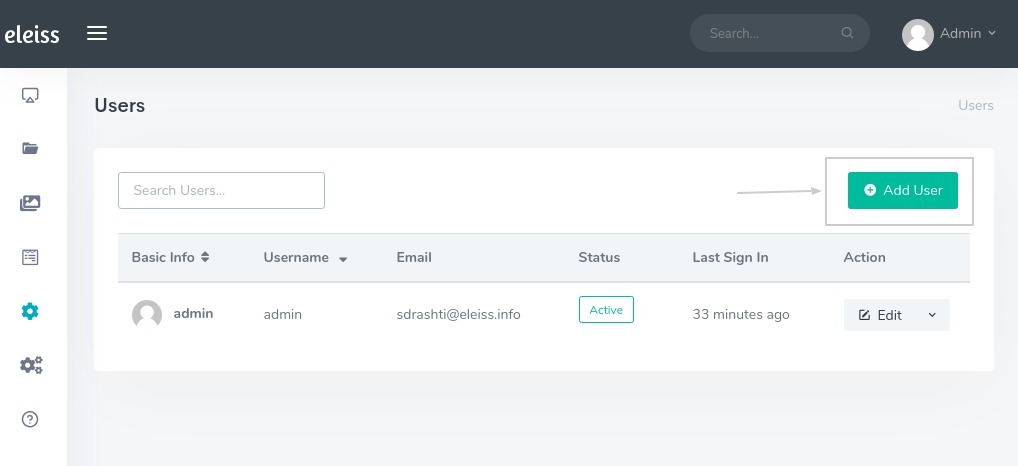
Go to ‘Settings > User Settings’ using Menu
Click on ‘Add user’
Fill in all the necessary details, assign the roles to the User
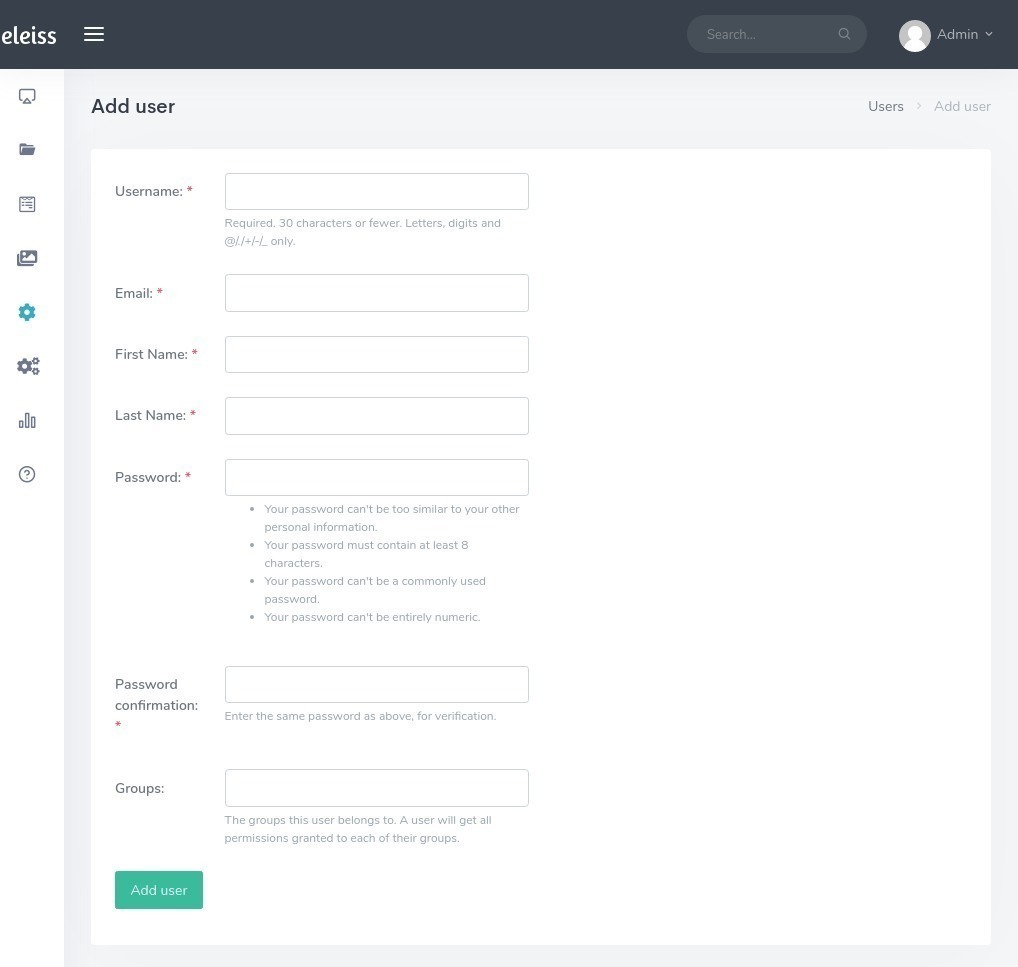
Click on ‘Save’
How to add Google Map on my website?
Follow below steps,
Go to ‘Pages’ from Menu

Go to the page on which you want to add the Google Map by clicking on ‘Edit’
Go to ‘Content’ tab
Click on ‘Plus’ icon
Click on ‘Google Map’ from the list
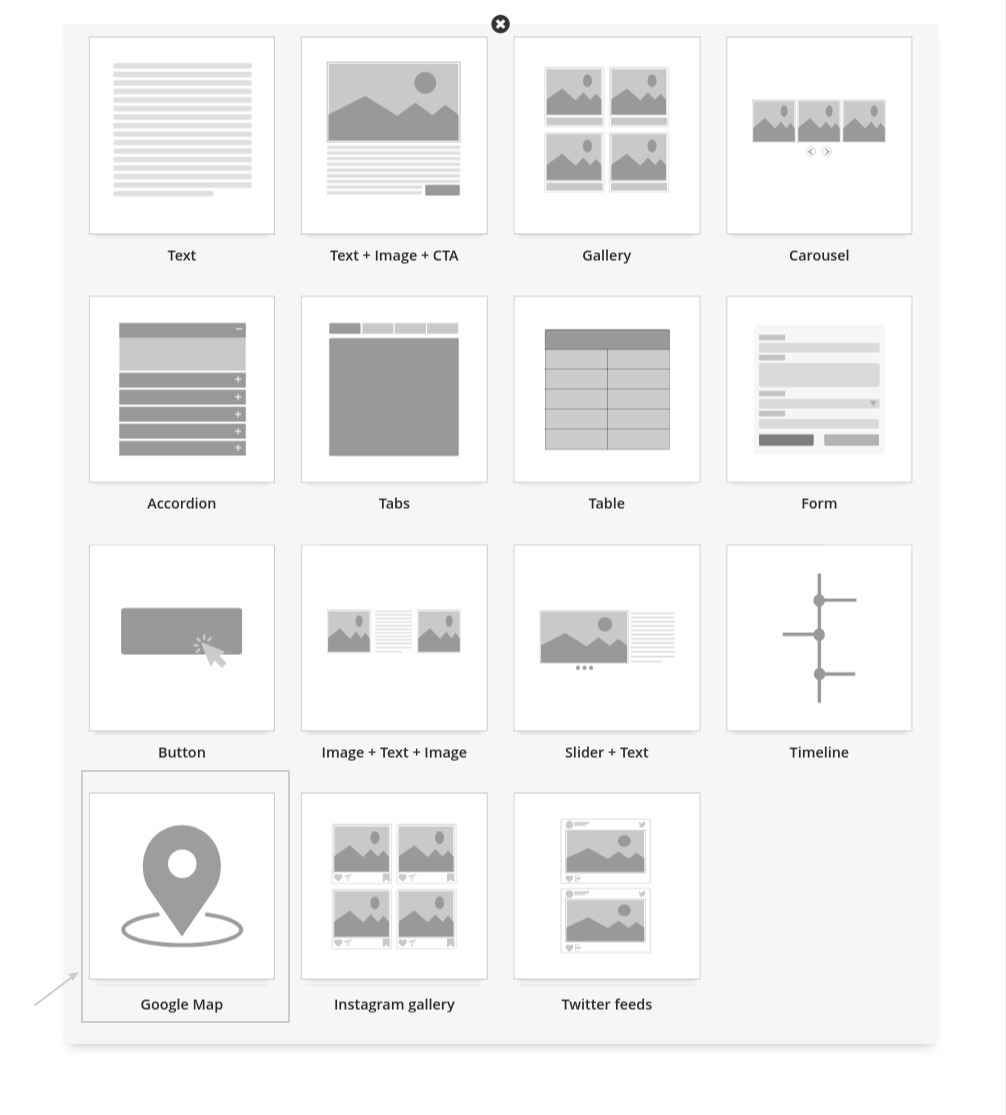
Enter the whole address register on Google
Preview the page and then publish the page
Have added Google Map but that isn’t visible on website! Why?
Even after adding right address on page, Map is not visisble then follow the below steps,
Check your entered address on https://www.google.com/maps/ if it displays the pin on the map then follow the next step. Otherwise register your location on Google Map.
Check that you have added the Google Map Key. Go to ‘Settings > 3rd Party Integration > Google > Map Settings’ tab and check that key is added. If not then add the Google Map key. If it is added then follow the below step.
Check that address don’t contain the word ‘&’. If it is there then remove ‘&’ and add ‘and’. And even if your problem isn’t solved then contact our sales team.
Steps to Create Google Map Key,
Visit the Google Cloud Platform Console.
Click the project drop-down and select or create the project for which you want to add an API key.
Click the menu button and select APIs & Services > Credentials. On the Credentials page, click Create credentials > API key.
The API key created dialog displays your newly created API key.
Click Close. The new API key is listed on the Credentials page under API keys.
How to verify that my website has visitor tracking feature enabled?
Visit any page of your website and press ‘CTRL + U’ OR Right click on page and select ‘View page source’
Press ‘CTRL + F’ and search for ‘Google analytics script’ it should contain two script tags.

How to copy a existing page?
Go to ‘Pages’ from Menu
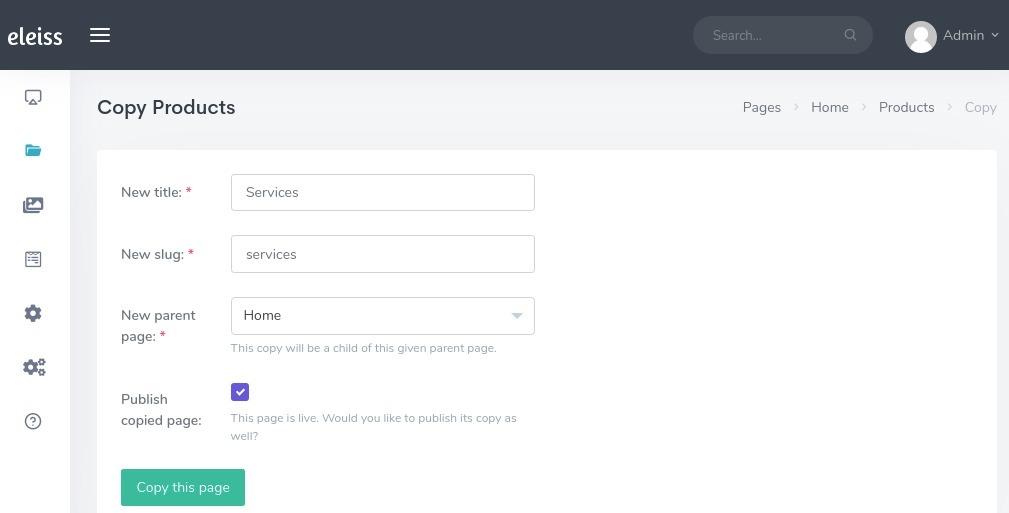
Click on dropdown menu and select ‘Copy’ from ‘Action’ column of a page for which you want to copy

Add new Title, Slug, Parent page details and click on copy the page
How to move one page to another parent section?
Go to ‘Pages’ from Menu
Click on dropdown menu and select ‘Move’ from ‘Action’ column of a page for which you want to move

Choose Parent Page
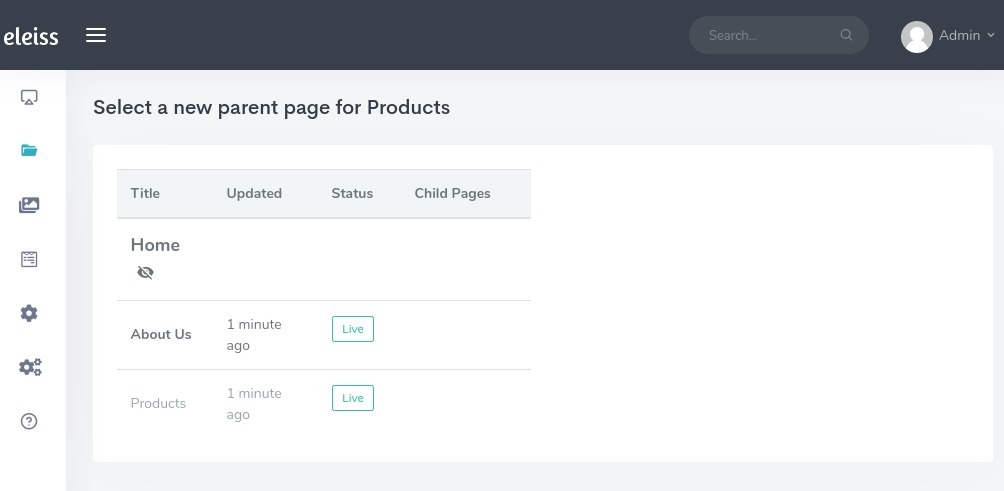
Confirm the selection
Want page should be partially delete from website, later that should be recoverable.
Don’t worry that is possible, follow below setps,
Go to ‘Pages’ from Menu

Click on dropdown menu and select ‘Unpublish’ from ‘Action’ column of a page for which you want to partially delete

Click on ‘Yes, unpublish it’
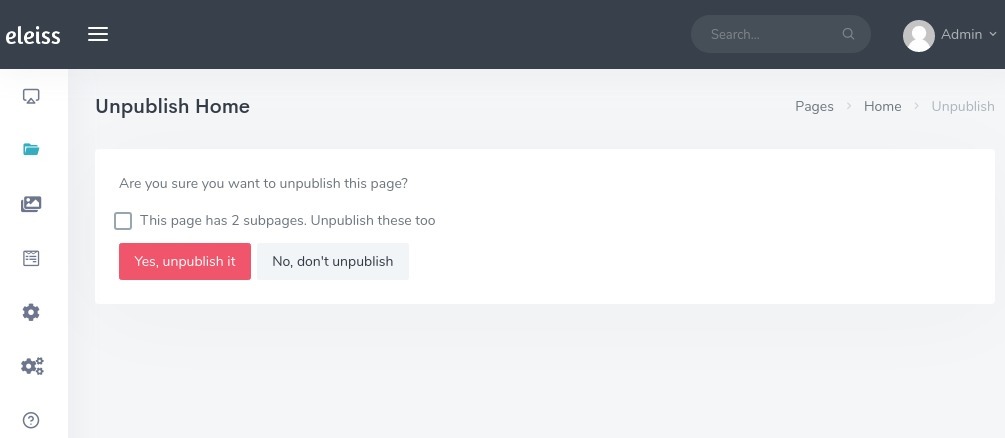
Later when you want to publish that, go to that page and click on edit and at bottom click on ‘Publish’.
Want to remove breadcrumbs from a page. How to do?
Go to the page from which you want to remove breadcrumb using ‘Pages’ from Menu

Click on Edit from ‘Action’ column
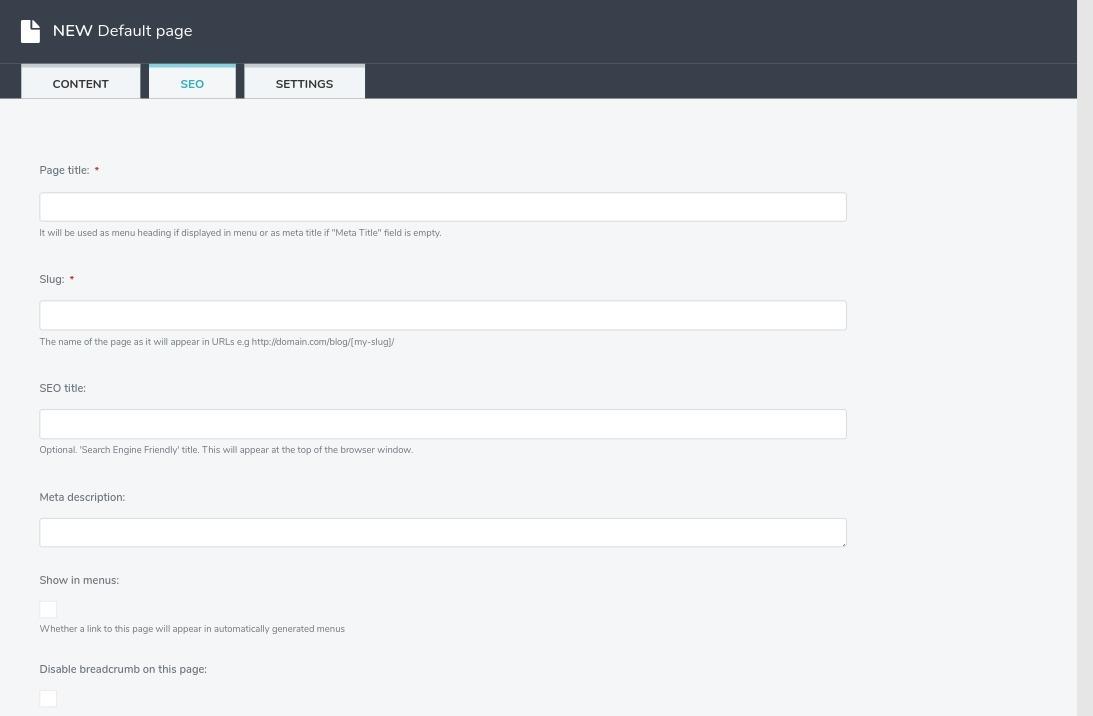
Go to ‘SEO’ tab
Mark the checkbox - ‘Disable breadcrumb on this page’

Click on Publish
Note
Make sure you clear the browser cache.
How to verify that my website has facebook pixel feature enabled ?
Visit any page of your website and press ‘CTRL + U’ OR Right click on page and select ‘View page source’
Press ‘CTRL + F’ and search for ‘Facebook pixel script’ it should contain script tags.
How to add form on website?
Go to ‘Pages’ from Menu

Click on Edit on which you want to add the form OR click on ‘Add child page’ if you want to add form on new page
Click on plus and select option ‘Form’
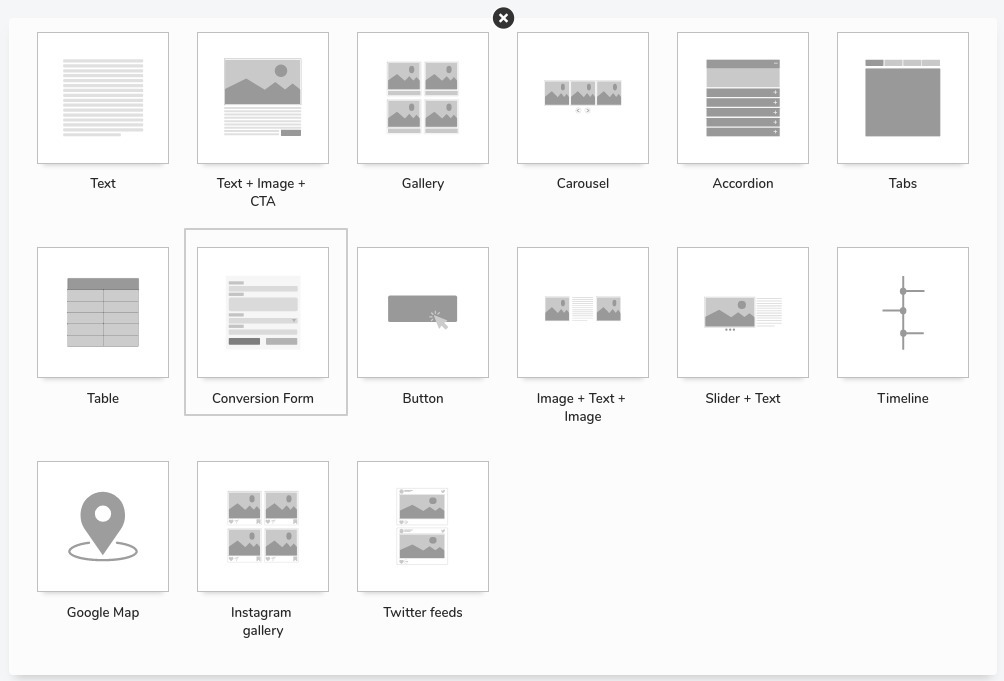
Select the form from dropdown
Add title for the form (optional)
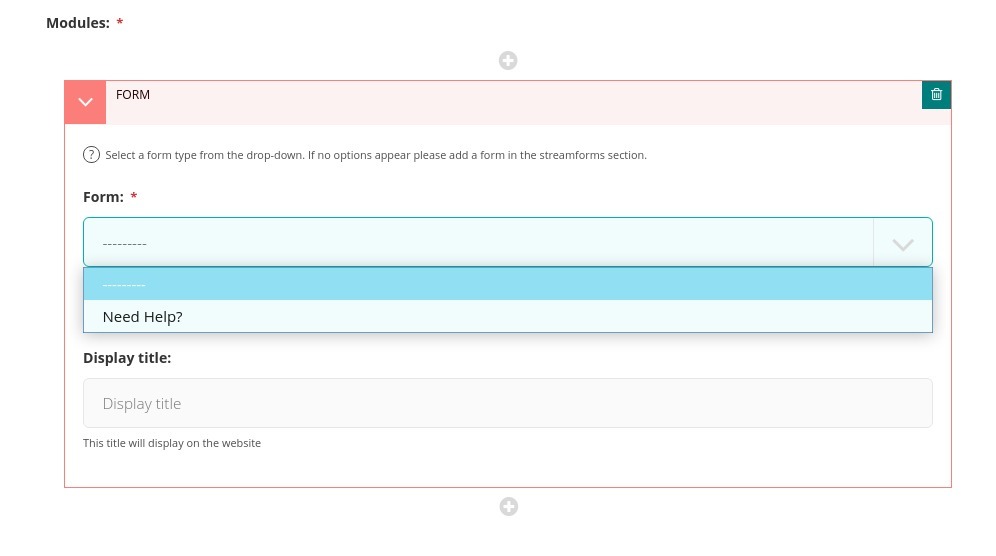
Publish the page
If dropdown don’t contain form you required then add form manually. And then perform above steps.
Steps to add form manually;
Go to ‘Conversion Forms’ from Menu

Click on ‘Add Conversion Form’
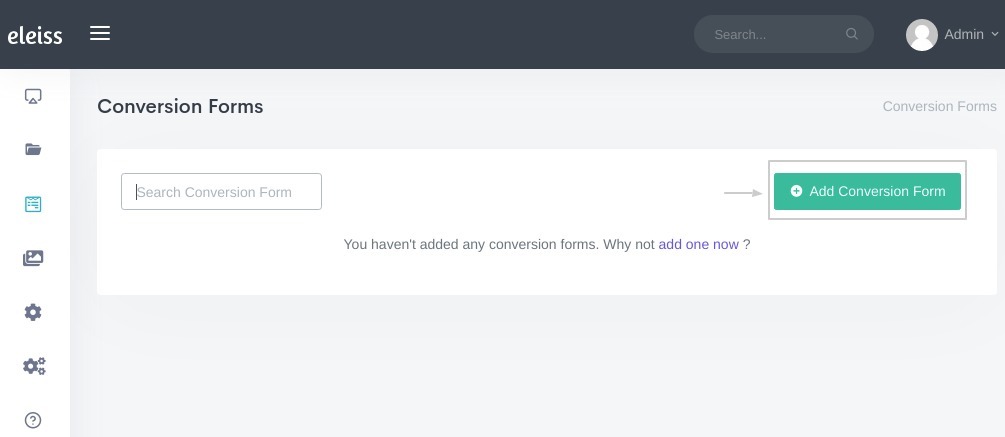
Fill Details in ‘General’ Tab. Details need to be filled are Title, Slug, Template, Submit Button text, Success Message, Mark Email Submission and Save form submission data and Post Redirect Page
Fill Details in ‘Field’ Tab. Select the fields and add details
Save the form
Does my website contain Google schema?
Yes, You aren’t required to do anything for that. Pages wise schema will automatically gets generated.
Note
This is an automatic feature in all plans.
How to change user’s permissions ??
Using our System you can create three types of users:
Administrator User
Editor User
Moderator User
Get an Editor user to create and edit your content without the control to make it live. Get the Moderator user to review the content and make it live. Get the admin to lock the critical content to avoid any content mishap.
Click here to know that which user can perform which operations.
Follow below steps,
Go to ‘Settings > User Settings’ using Menu

Click on ‘Edit’ for the user which you want to change the permission
Update user type from ‘Groups’
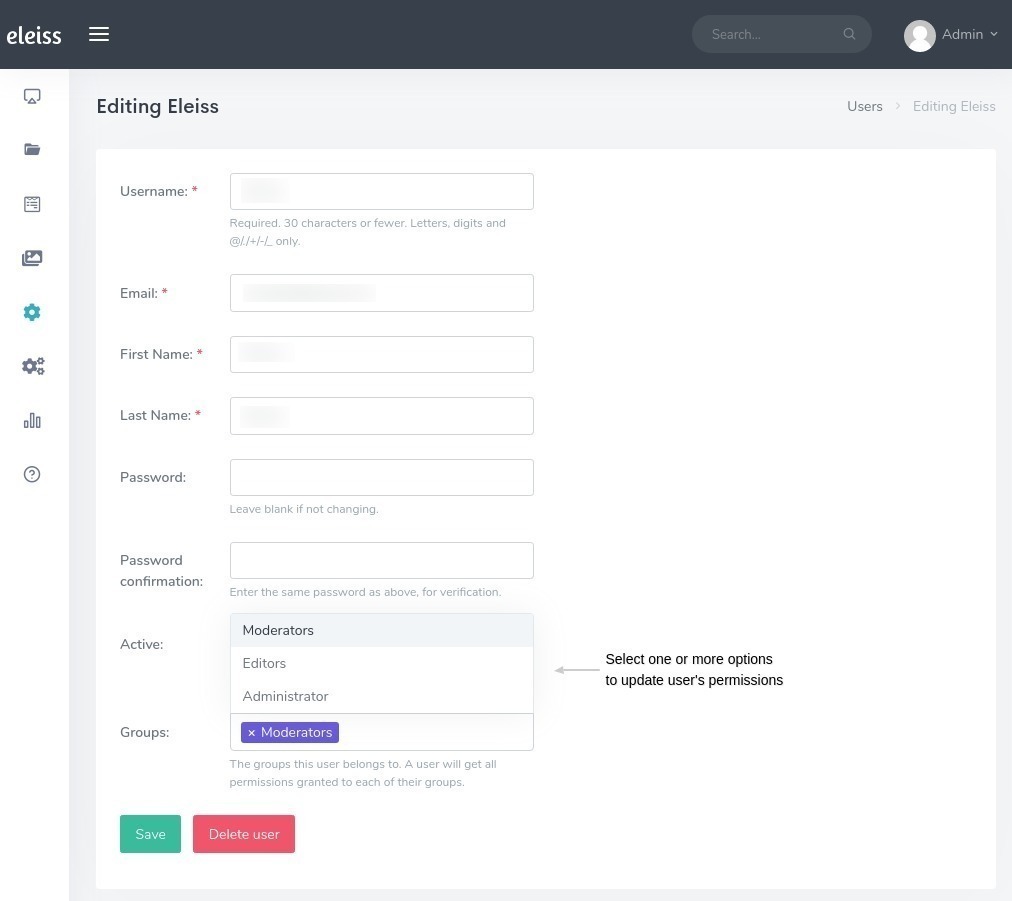
Click on ‘Save’
How to generate access token for integrating Instgram post on website ??
Follow stpes mentioned on link .
How to change mobile number on Header ??
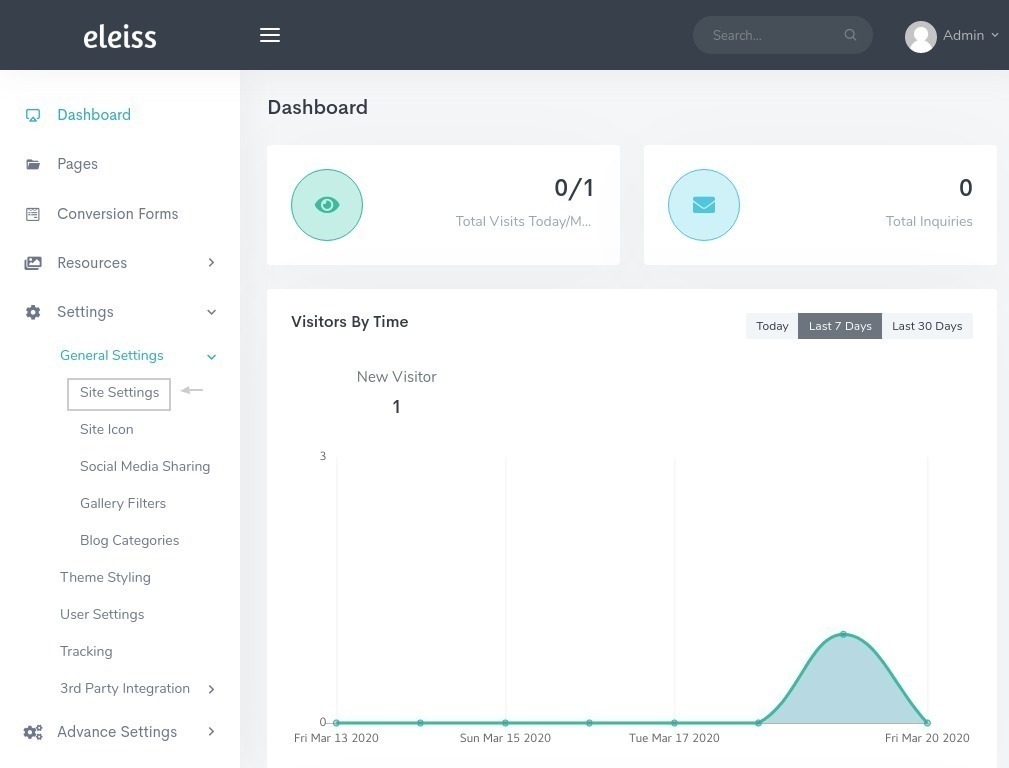
Go to ‘Settings > General Settings > Site Settings’ from Menu
By default mobile number which is added first in mobile number section will be set on header. So, add the mobile number first which you want on Header.
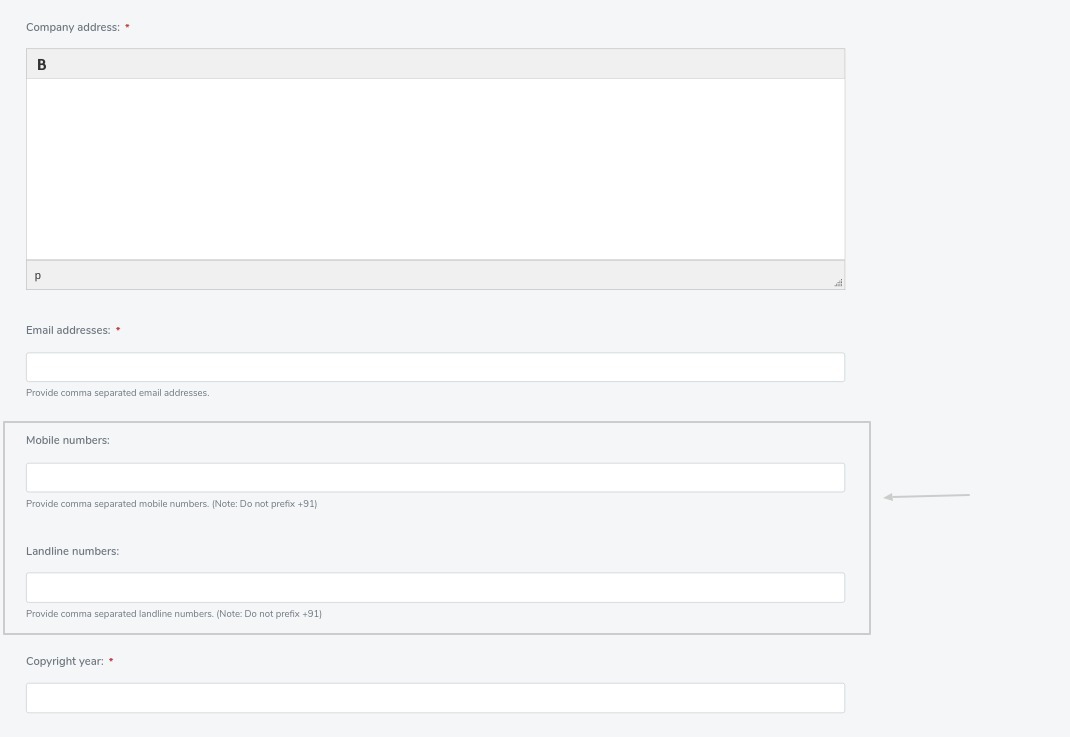
Click on ‘Save’
How to change email address on Header ??
Go to ‘Settings > General Settings > Site Settings’ from Menu

By default emaill address which is added first in email address section will be set on header. So, add the email address first which you want on Header.
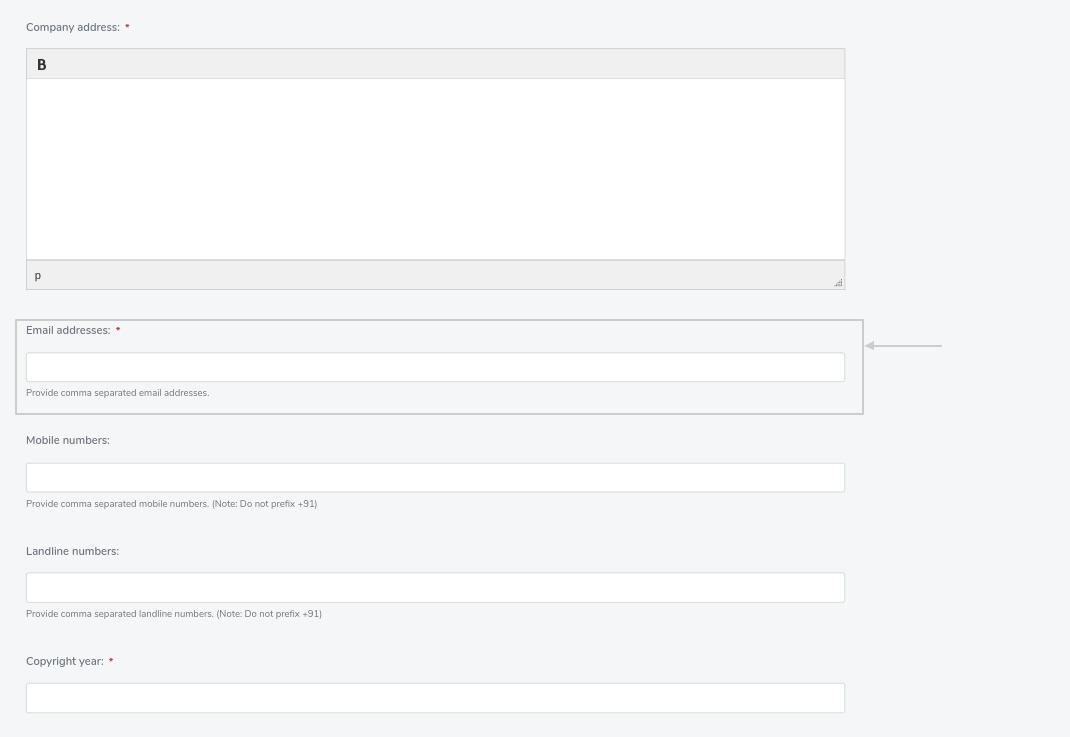
Click on ‘Save’
How to remove email address and mobile number form Header ??
Go to ‘Settings > General Settings > Site Settings’ from Menu

Select the Header type ‘Default Header’ instead of ‘Corporate Header’
Click on ‘Save’
How to update logo on website ??
Go to ‘Settings > General Settings > Site Settings’ from Menu

Click on ‘Update Image’ for Company logo
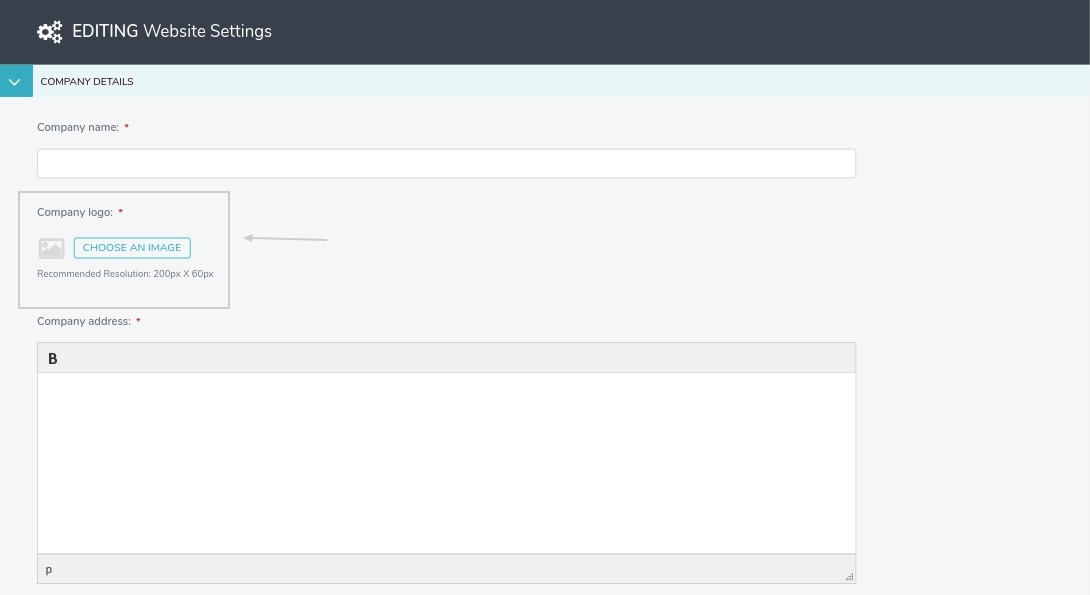
Click on ‘Save’
How to temporary remove any existing user without deleting them??
Go to ‘Settings > User Settings’ from Menu

Go to edit view of that user
Unmark the Active checkbox
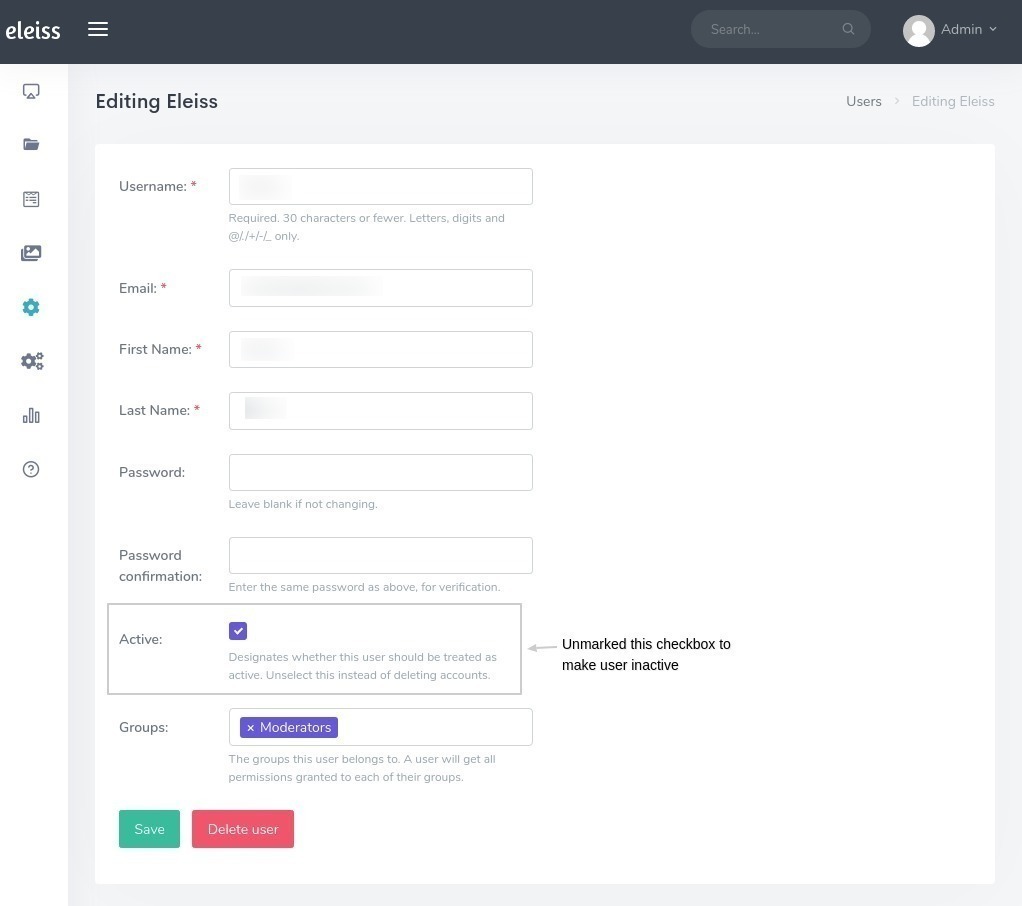
Click on ‘Save’
This will unactive that user temporary without removing them. When you want to make them active mark the ‘active’ checkbox.
Is it possible that I don’t get inquiry on mails and only system saves the submissions?
Yes, That is possible in the System. You only need perform below setting and inquiry on mail will stop for that form,
Go to ‘Conversion Forms’ from Menu

Click on Edit form for which you want to stop inquiries on mail
Go to ‘General’ tab and scroll down and find checkbox with ‘Email submission’, unmark that checkbox
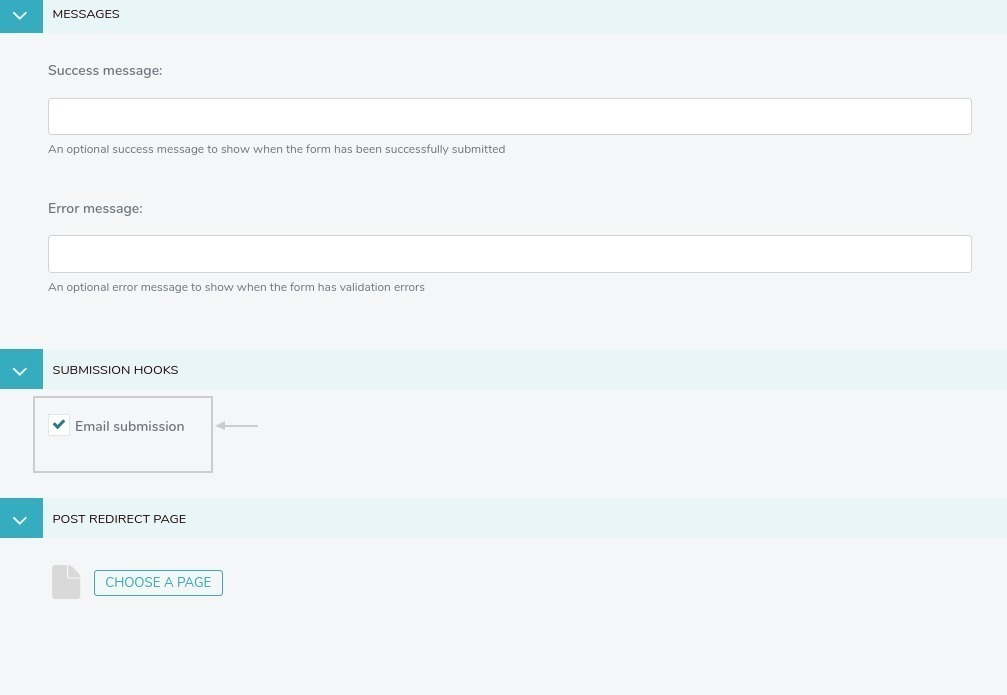
Click on ‘Save’
Is it possible that I get inquiries on mail only, system don’t save any submissions?
No, That isn’t possible.
How to update success/error message on form submission ??
Go to ‘Conversion Forms’ from Menu

Click on Edit form for which you want to customize the messages
Go to ‘General’ tab and scroll down and find success message and error message section, update your message accordingly
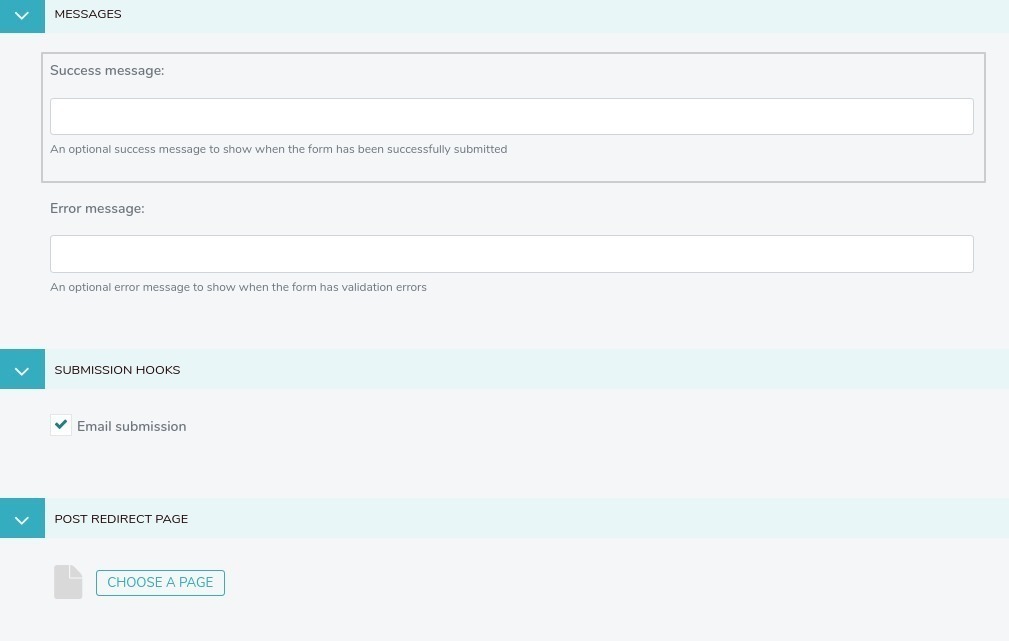
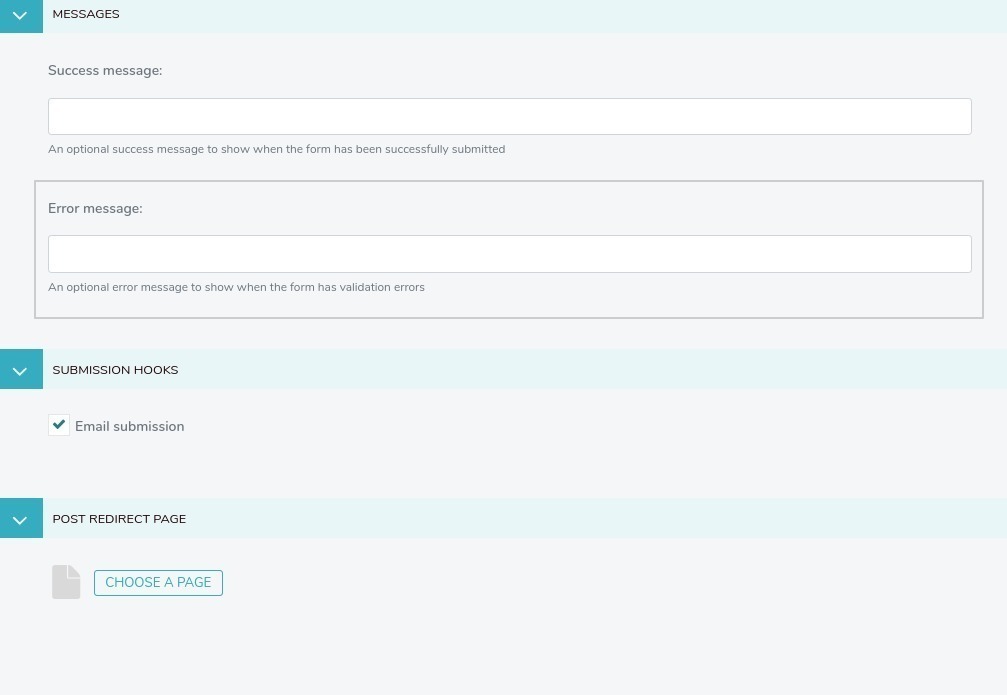
Click on ‘Save’
How to know that editor, moderator and administrator user has which access rights ??
How to add lightbox gallery filter type?
Go to ‘Settings > General Settings > Gallery Filters’
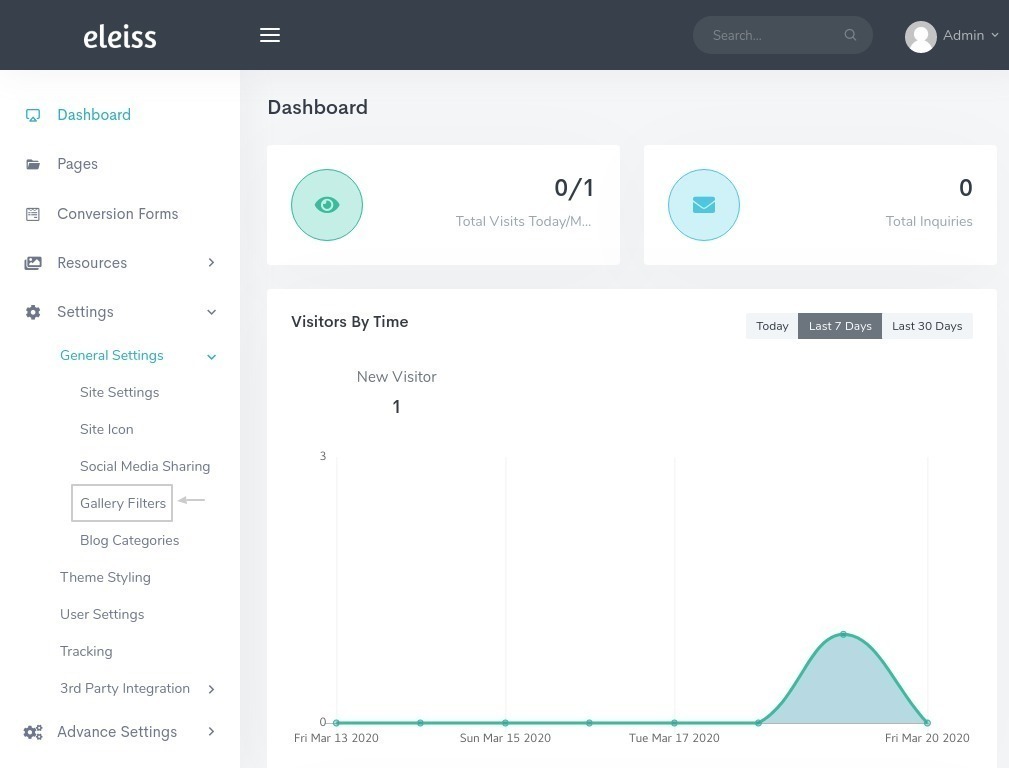
Add filter by clicking on ‘Add Gallery Filter’
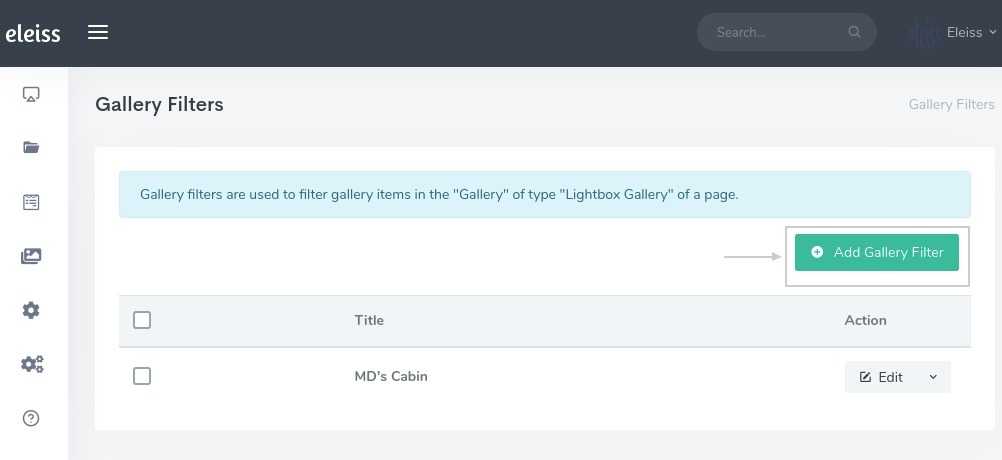
Click on Save
How to view generated form inquiries in system??
Go to ‘Reports > Inbound inquiries’
